Working in the spreadsheet
The requirements spreadsheet, explained for someone who knows Excel — typing, moving around, adding rows, changing where a row sits, and what is different.
Updated 19 October 2026
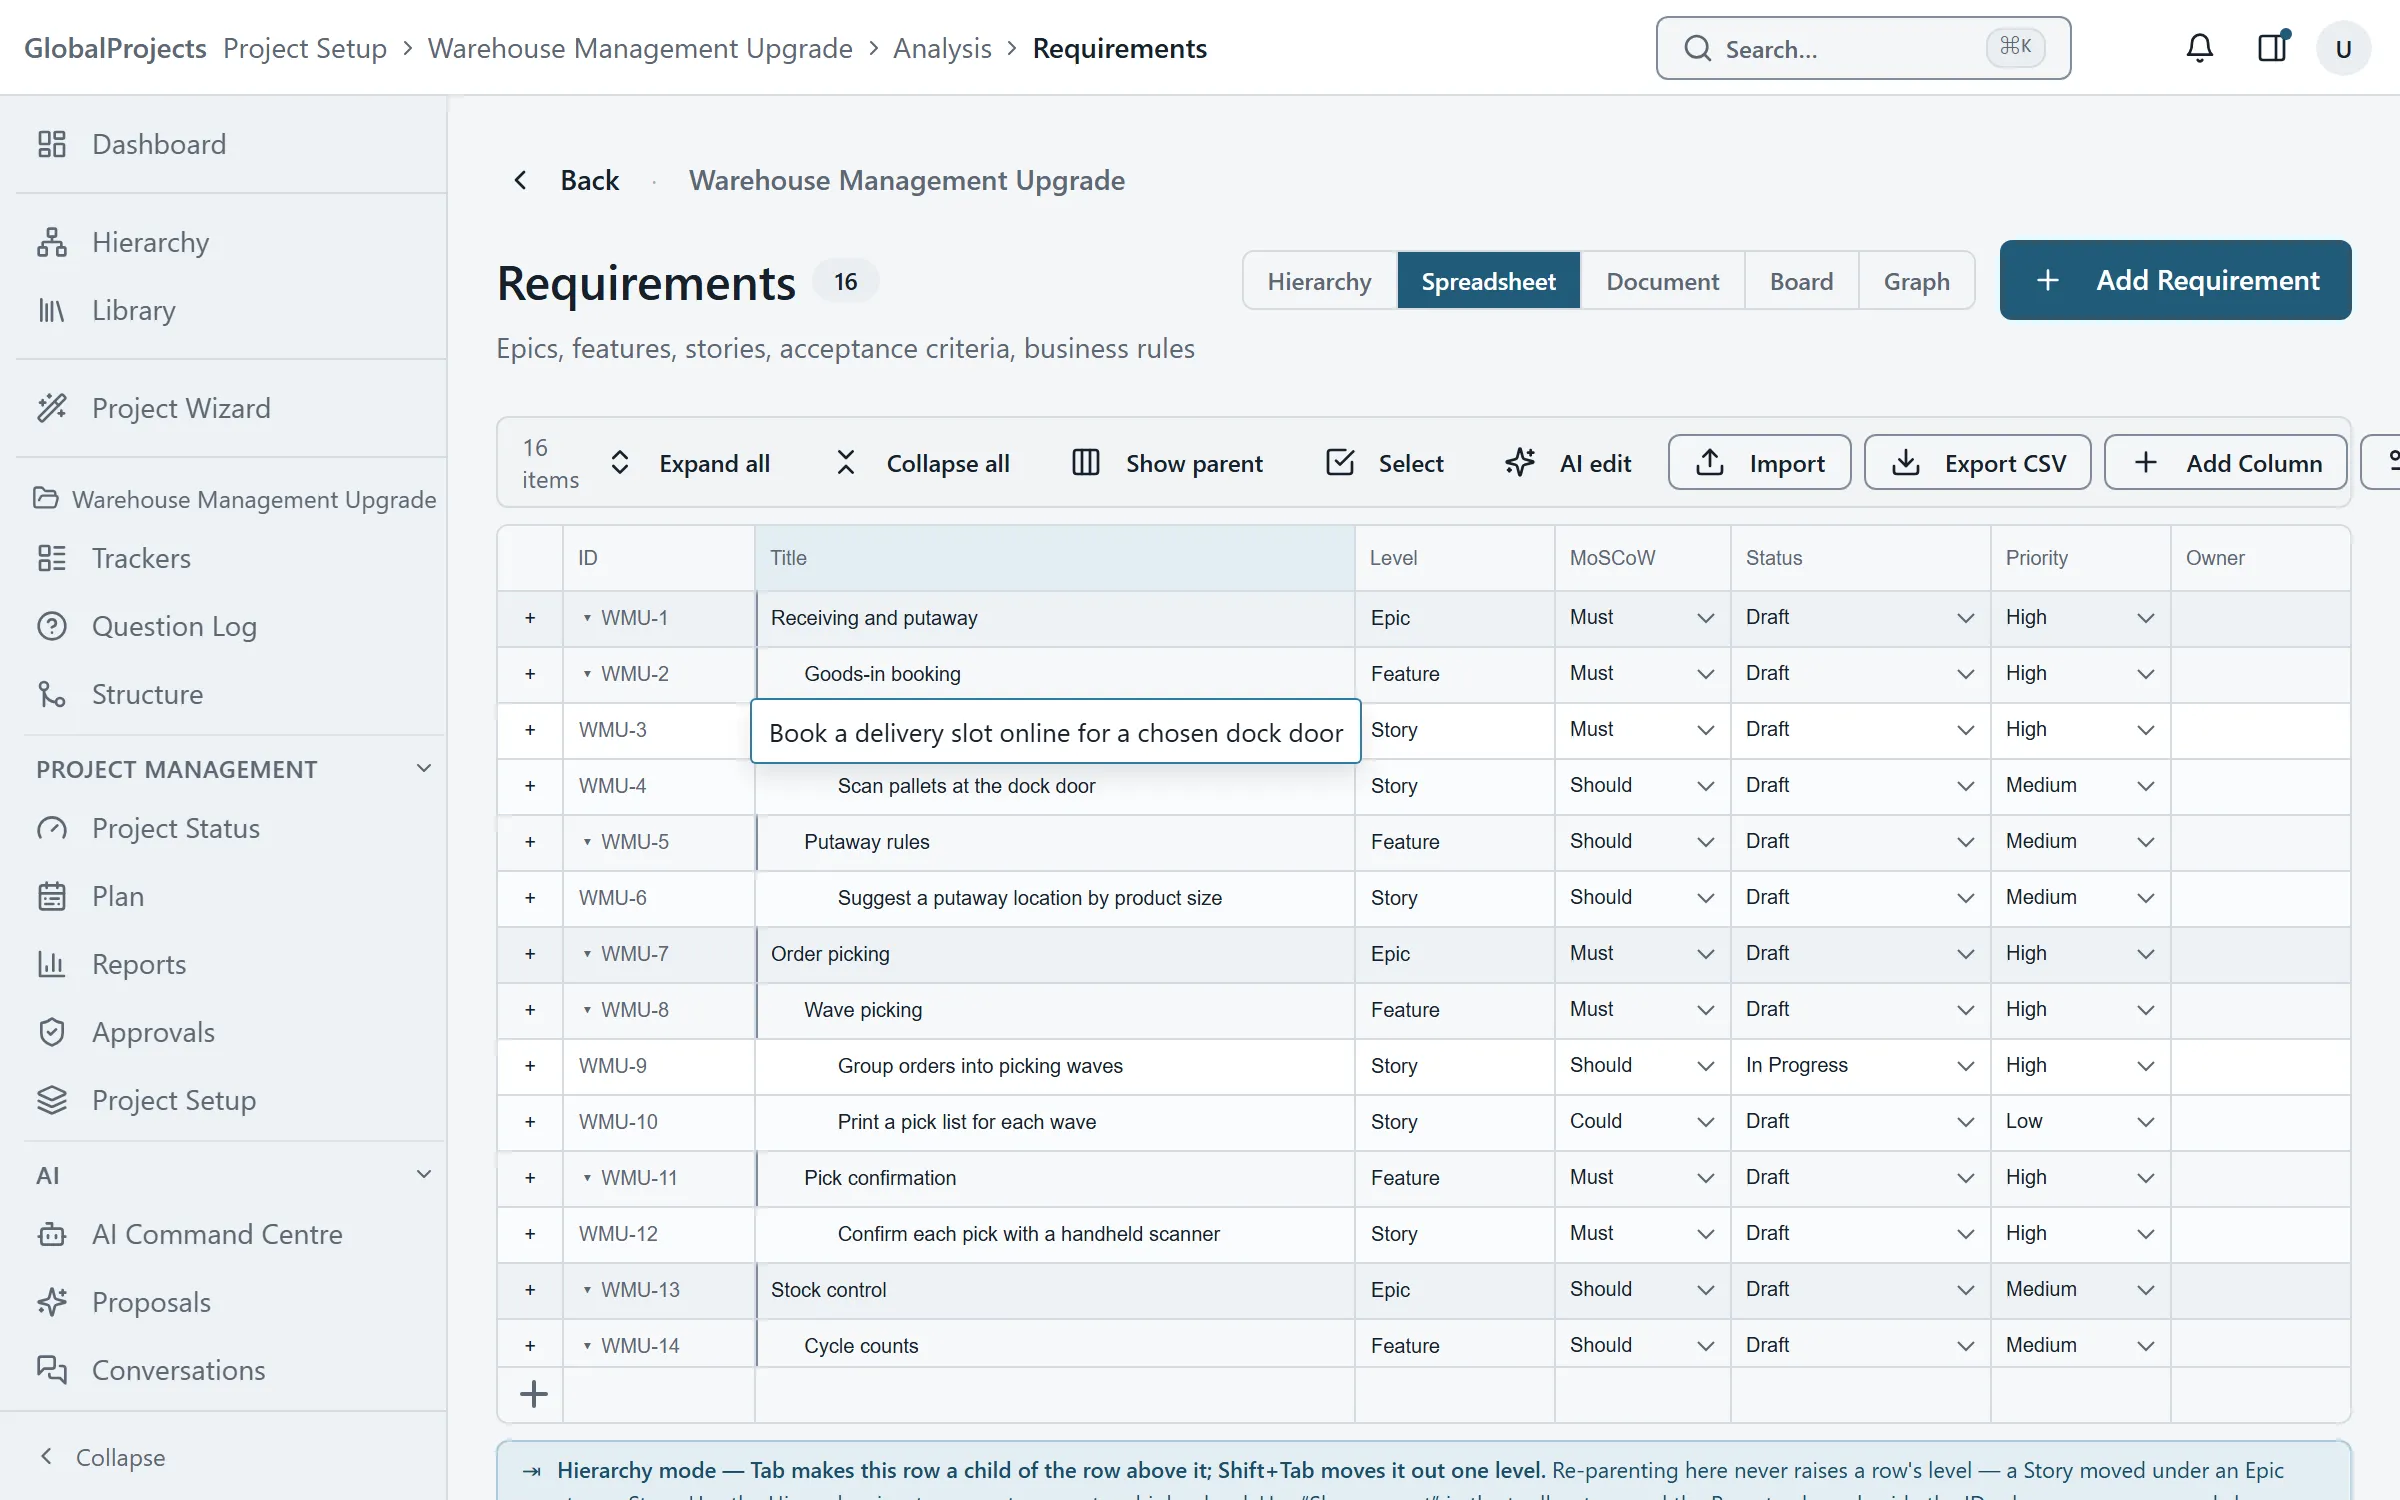
If you have kept requirements in Excel, the spreadsheet will feel familiar. Each row is a requirement, each column is a field, and you type straight into the cells. The difference is that the rows form a tree: a story sits inside a feature, which sits inside an epic.
Open your project, choose Requirements in the left navigation, then choose Spreadsheet at the top of the page.
Type into the grid
- Click a cell, or move to it with the arrow keys.
- Start typing, double-click, or press Enter to edit the cell.
- Press Enter or Tab to keep your change. Press Esc to cancel it.
- For MoSCoW, Status, Priority and Owner, click the cell and pick from the list. The Status list only offers the moves your project allows.
- To fill a long field, use Acceptance Criteria one criterion per line. Press Shift+Enter for a new line inside the cell.
Add rows
- Click + at the start of a row. On a group (an epic or a feature) it adds a row inside it. On a requirement it adds a row directly below, with the same parent.
- Or go to the last row and press Enter. The new row keeps the parent of the row you were working in.
- Press Ctrl+Enter (⌘+Enter on a Mac) to add a row beside the current one, at the same level.
- The new row's title reads New requirement. Double-click it and type the real title.
Change where a row sits
- Click a cell in the ID or Title column. The strip under the grid says Hierarchy mode.
- Press Tab to make the row a child of the row above it.
- Press Shift+Tab to move it out one level.
- To see and change any row's parent directly, choose Show parent in the toolbar and use the Parent column.
Opening and closing groups
Click the ID of an epic or a feature to fold or unfold it, or use Expand all and Collapse all in the toolbar. Clicking the ID of a requirement with nothing under it opens that requirement in a window.
Copy and paste
Ctrl+C, Ctrl+X and Ctrl+V work on cells, as in Excel. Delete clears a text cell. Pasting into a list column such as MoSCoW is ignored: pick from the list instead. To bring in many rows from Excel at once, use Import — see Paste requirements from Excel.
What is different from Excel
- There is no undo. A change is saved as soon as you leave the cell.
- There is no fill-down, no sorting, no filtering and no Find. Columns can be made wider, but not moved.
- Moving a row with Tab never changes its level: a story moved under an epic stays a story. To raise a row to a higher level, use Move out one level in the Hierarchy view.
When a change is saved
A cell you have just changed is tinted while it saves. If someone else changed the same row first, a message tells you who, and that your change was not saved. Choose Apply anyway to save yours over theirs, or leave it and look at their version.
Your own columns
Choose + Add Column to add a field to one level, for example a Definition of Done on stories. Manage lists the columns you have added. See Custom fields for each level.
Related articles
- The requirements hierarchy
How requirements sit inside each other, how to add, move and delete them in the Hierarchy view, and the five ways to look at the same requirements.
- Paste requirements from Excel
Copy a range from Excel, map its columns, check a preview and create the requirements in one go — nothing is created until you confirm.
- Export to Word and Excel
Download your requirements as a CSV that Excel opens, or as a Word document, and see who your project lets export.