The requirements hierarchy
How requirements sit inside each other, how to add, move and delete them in the Hierarchy view, and the five ways to look at the same requirements.
Updated 19 October 2026
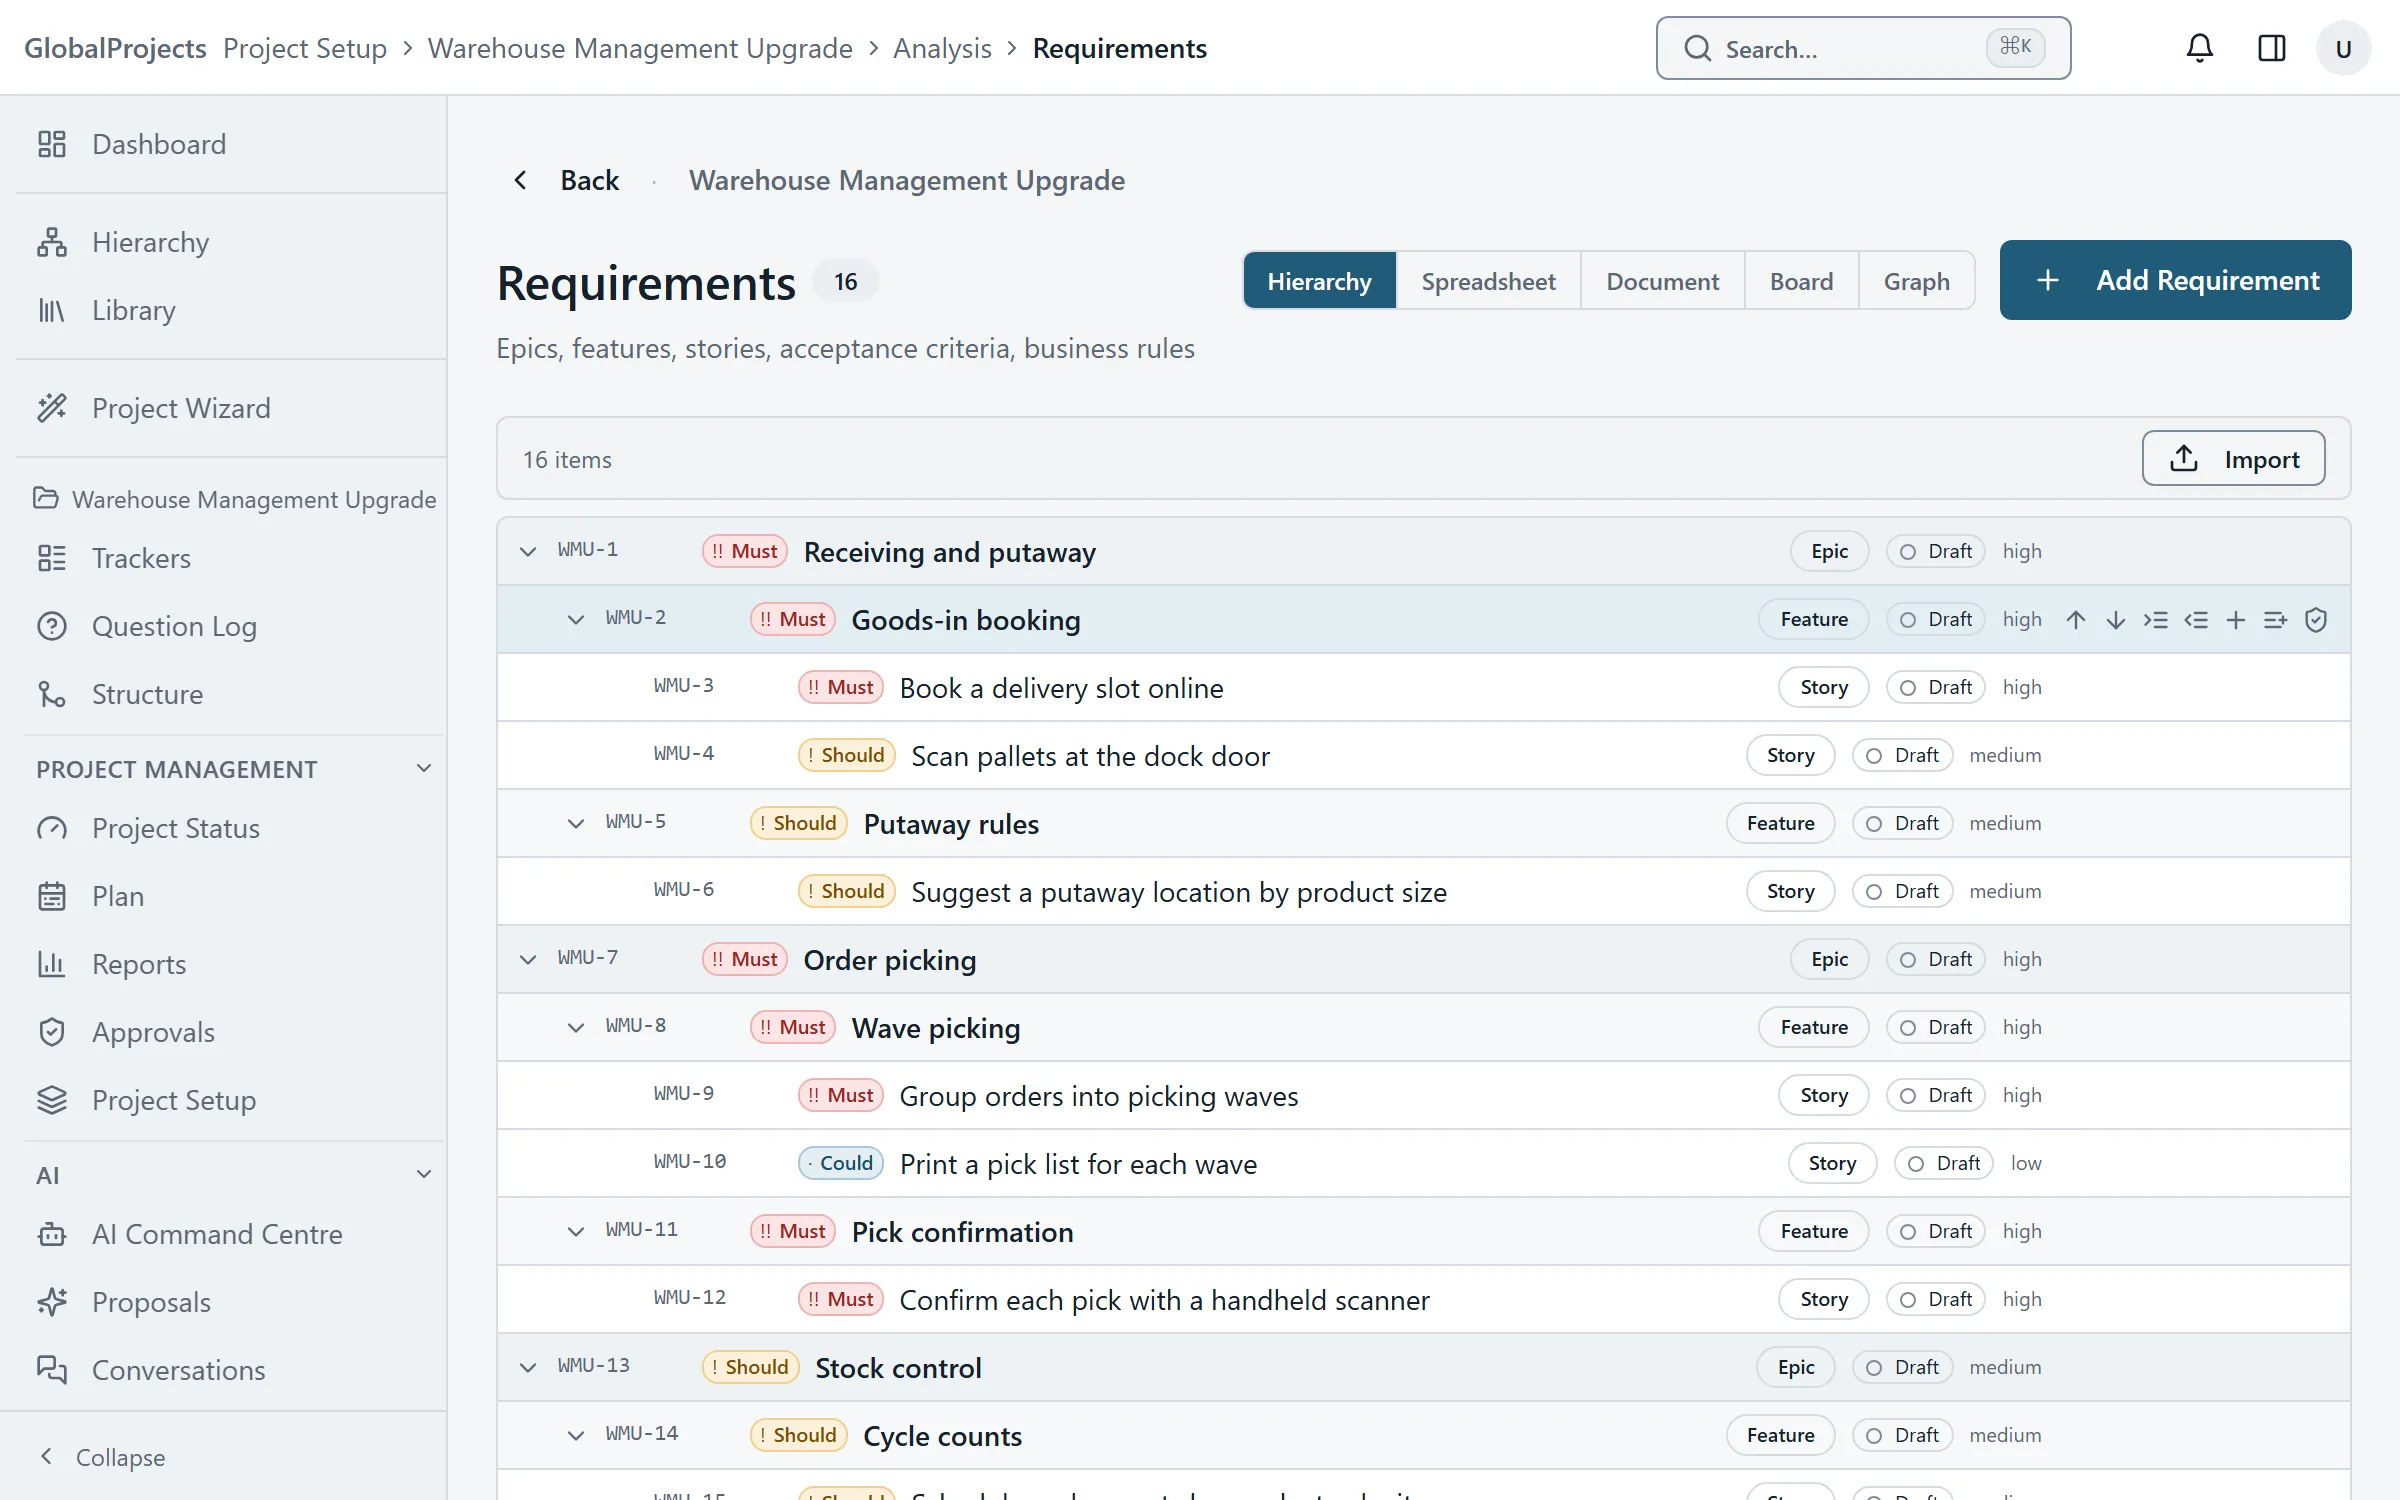
Every requirement in a project sits in one tree. A small requirement sits under a bigger one, and that one may sit under a bigger one again. The names of the levels belong to your project: by default they are Epic, Feature and Story.
There is only one copy of each requirement. The Hierarchy, Spreadsheet, Document, Board and Graph views all show the same requirements, so a change made in one view is in all of them.
Open the requirements
- Open your project.
- In the left navigation, under Definition, choose Requirements.
- Use the switch at the top of the page to pick a view: Hierarchy, Spreadsheet, Document, Board or Graph. The page remembers your choice for this project.
Add a requirement where it belongs
- In the Hierarchy view, point at the row you want to add to. Its row tools appear on the right.
- Choose + child to add a requirement inside it, or + sibling to add one beside it.
- Type the title and press Enter. The row stays open, so you can type the next one straight away.
- Press Esc when you have finished.
- To add a new item at the top level, use the button at the bottom of the tree, for example + Add epic.
Move a requirement
- Point at the row you want to move.
- Choose Move up or Move down to change its place among its neighbours.
- Choose Make child of previous sibling to put it inside the row above it.
- Choose Move out one level to take it out of its parent. In this view that also raises its level.
Delete a requirement
- Click the requirement to open it.
- At the bottom of the window, choose Delete.
- Type delete in the box and choose Confirm delete.
What happens to the children when you delete
The requirements under a deleted item are kept. They move up to the deleted item’s parent. A deletion cannot be undone, which is why you type the word before it happens.
Opening a requirement
Click any requirement to open it in a window. It has the title, MoSCoW, status, description, user story, acceptance criteria, test scenario, context and notes, followed by its links, custom fields, approvals, comments and history. Click a section to edit it; each change is saved as you make it and you see Saved.
To change the status, use the buttons under Move to. You only see the moves your project allows from the current status.
The other views
- Spreadsheet is for working quickly across many rows. See Working in the spreadsheet.
- Document shows the requirements as a numbered business requirements specification.
- Board shows cards in columns. Choose Group by to switch the columns between Status, MoSCoW and Priority, and drag a card to change it.
- Graph draws the tree, or the links between requirements on its Relationships tab.
Changing the level names
The level names are set for each project under Project Setup. See Custom fields for each level.
Related articles
- Working in the spreadsheet
The requirements spreadsheet, explained for someone who knows Excel — typing, moving around, adding rows, changing where a row sits, and what is different.
- The document view
Read your requirements as a numbered business requirements specification, switch how fields are laid out, and print it or take it into Word.
- Custom fields for each level
Name your project's requirement levels and give each level its own fields — from Project Setup, or by adding a column in the spreadsheet.