Custom fields for each level
Name your project's requirement levels and give each level its own fields — from Project Setup, or by adding a column in the spreadsheet.
Updated 19 October 2026
Each project decides what its requirement levels are called and which extra fields each level carries. A story might need a Definition of Done; an epic might need a Business owner. Fields belong to a level, so a story's field does not clutter an epic.
Choose the level names
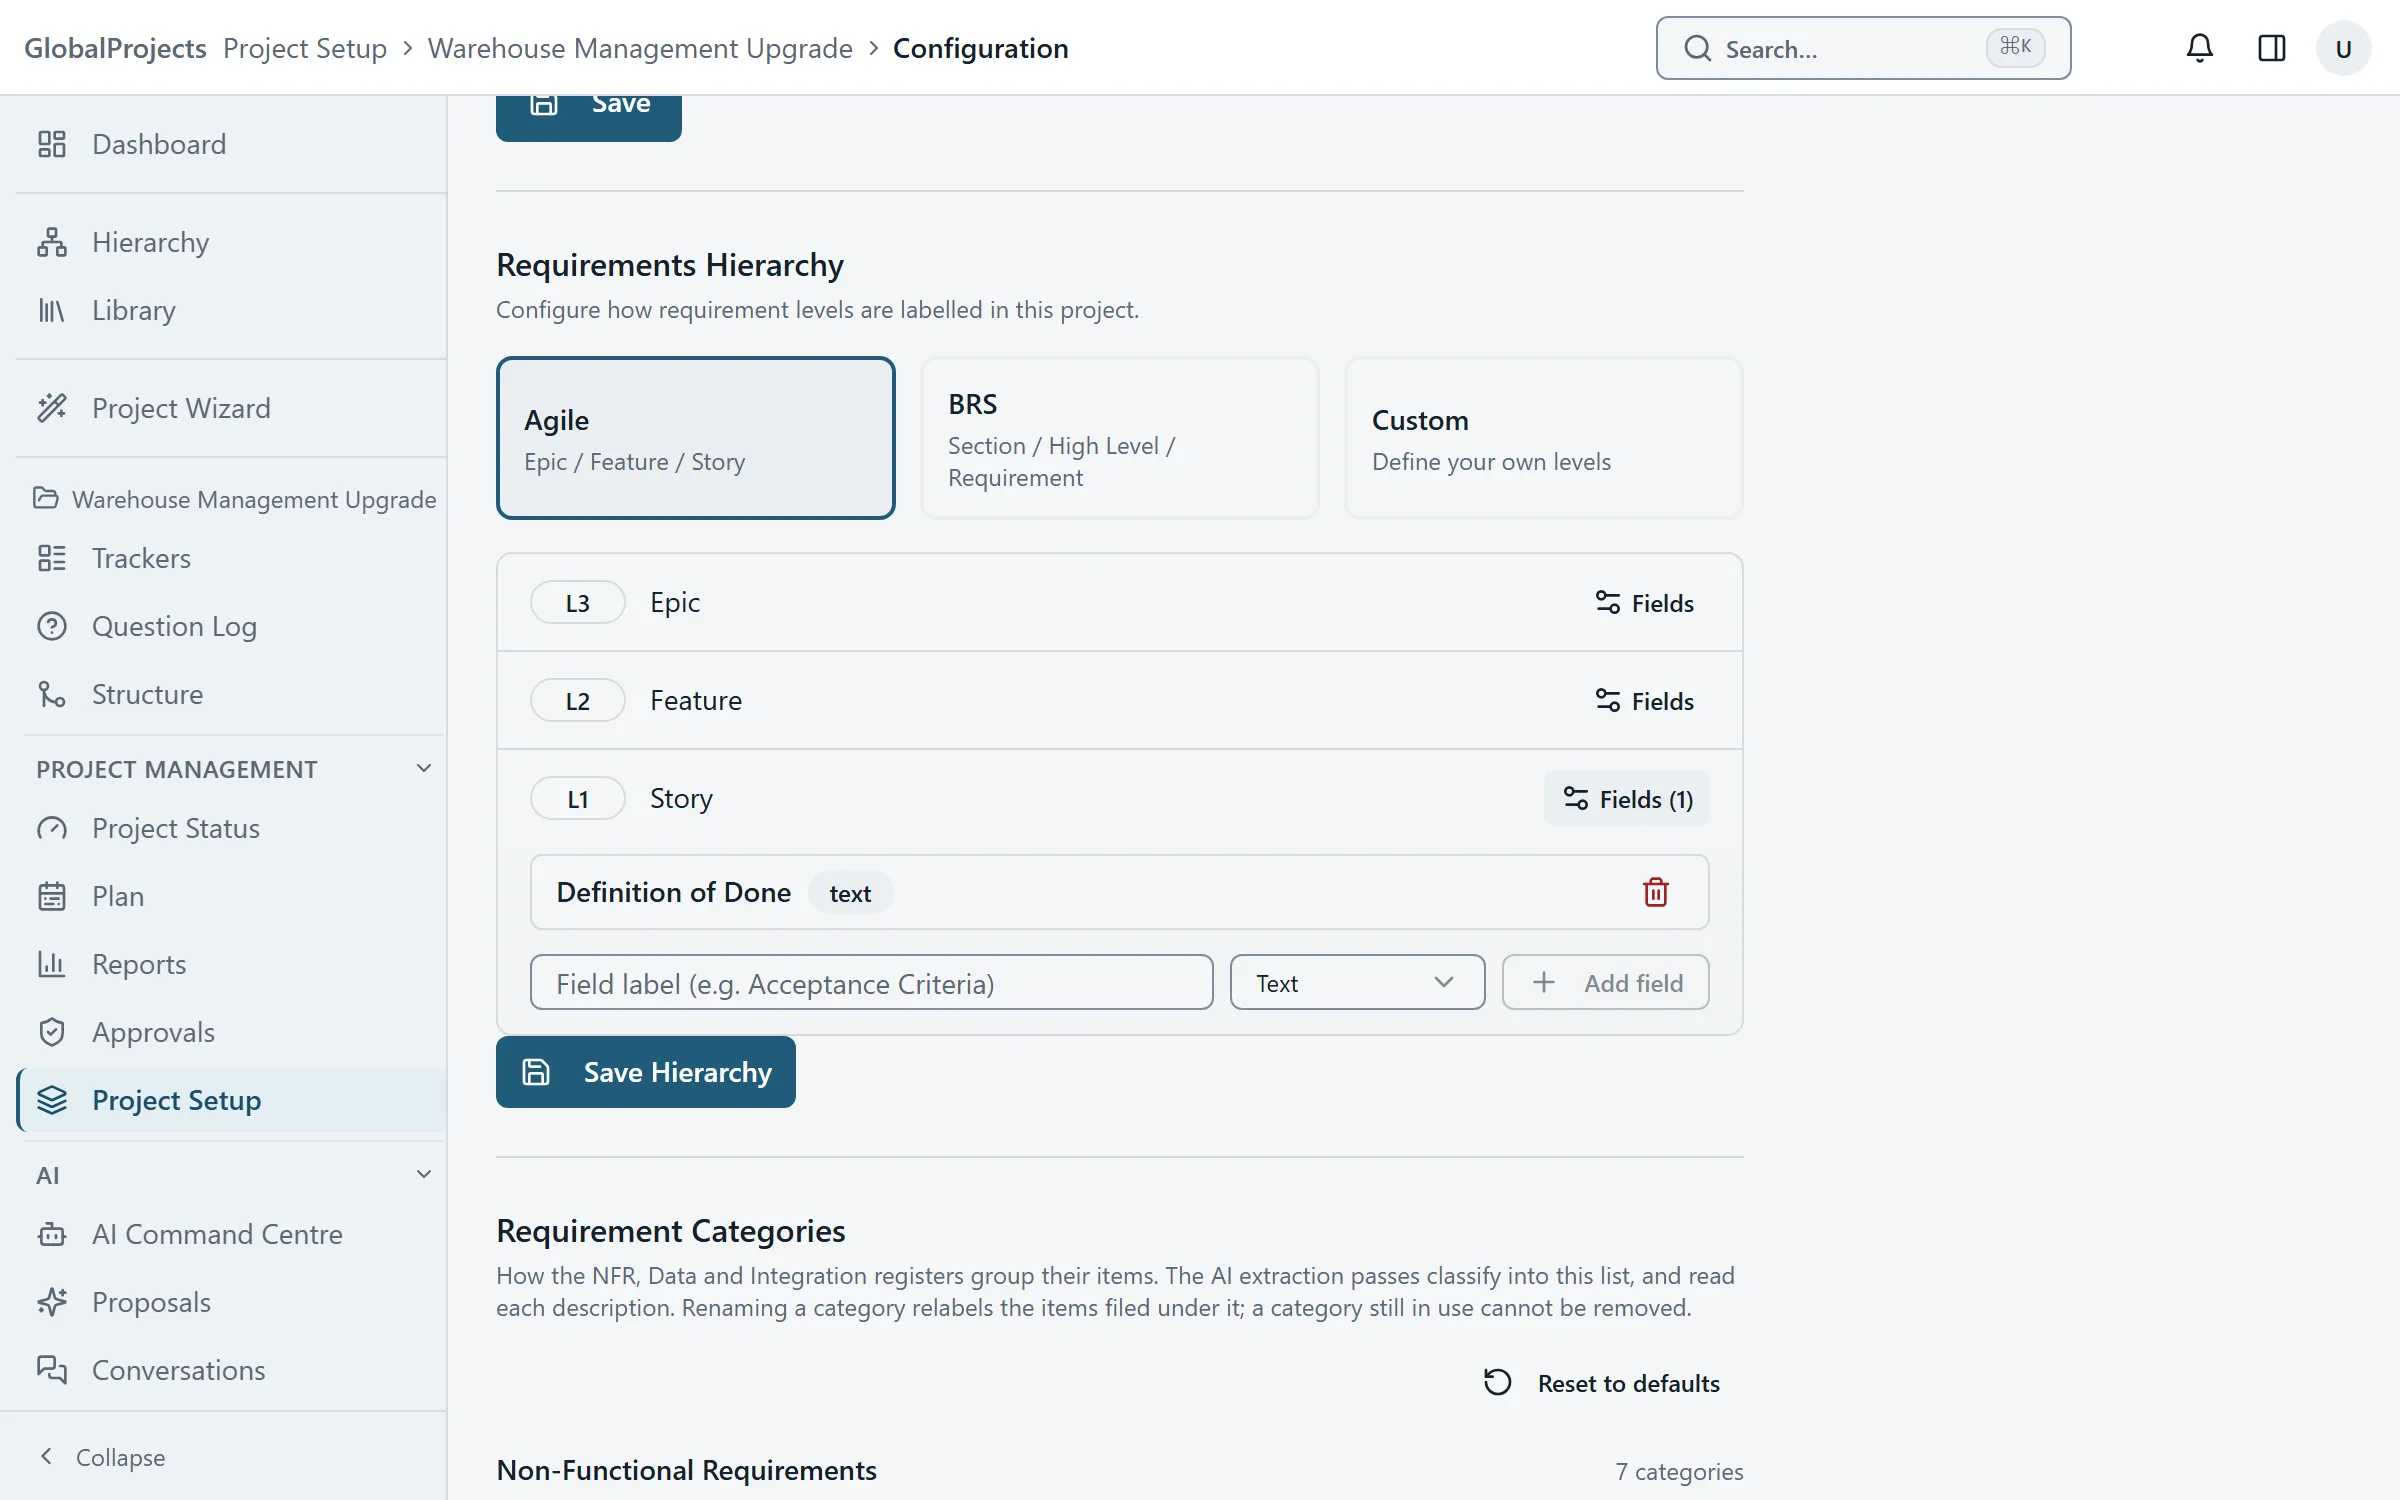
- Open your project and choose Project Setup in the left navigation. The page is headed Configuration.
- On the General tab, find Requirements Hierarchy.
- Pick Agile (Epic, Feature, Story), BRS (Section, High Level, Requirement) or Custom to name your own levels.
- For Custom, type a name under the list and choose Add. Use the arrows to put the levels in order.
- Choose Save Hierarchy.
Add a field to a level
- In Requirements Hierarchy, choose Fields on the level you want.
- Type the field's label, for example Acceptance Criteria.
- Pick its type: Text, Textarea, Number, Yes/No, Select, Multi-select, Date or User.
- For Select or Multi-select, type the options separated by commas.
- Choose Add field, then Save Hierarchy.
Add a field from the spreadsheet
- In Requirements, open the Spreadsheet view and choose + Add Column.
- Under Applies to level, choose the level.
- Pick a Type, type the Column name, and add options if it is a list.
- Choose Add column. The window stays open so you can add another; choose Close when you have finished.
Where your fields appear
- In the spreadsheet, as a column named after the field and its level, for example Definition of Done (Story). Rows of other levels show a dash.
- When you open a requirement, under Custom Fields.
- In the document view and the Word export, as a labelled line.
Before you switch presets
Choosing Agile or BRS replaces your levels with that preset’s, without their fields. If you then choose Save Hierarchy, the fields you added are removed. Add fields after you have settled on the level names.
Who can do this
Changing levels and fields needs the configure analysis framework permission on the project. A project’s Project Owner, Project Manager and Business Analyst have it by default. Without it, the controls are not available to you.
Company templates
Manage in the spreadsheet lists your columns and any Company Templates you can add with one click. If the list is empty, you see “No company templates yet.”
Related articles
- The requirements hierarchy
How requirements sit inside each other, how to add, move and delete them in the Hierarchy view, and the five ways to look at the same requirements.
- Working in the spreadsheet
The requirements spreadsheet, explained for someone who knows Excel — typing, moving around, adding rows, changing where a row sits, and what is different.
- Roles and permissions, in plain language
What each built-in role can do, how a role held across the company differs from one held on a project, and how to make a role of your own.